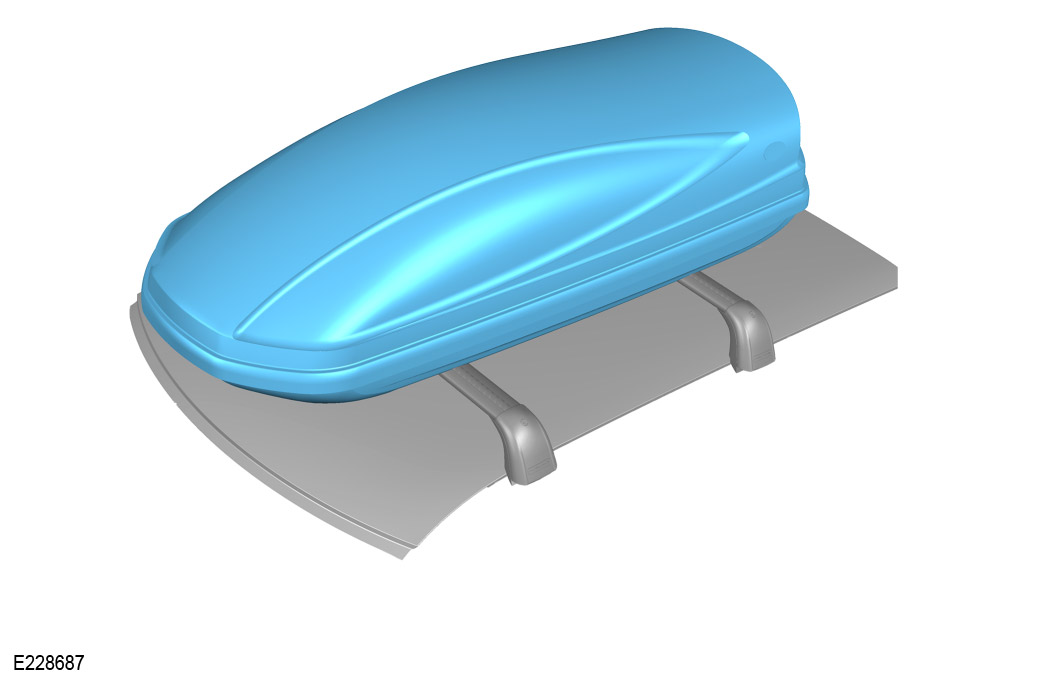
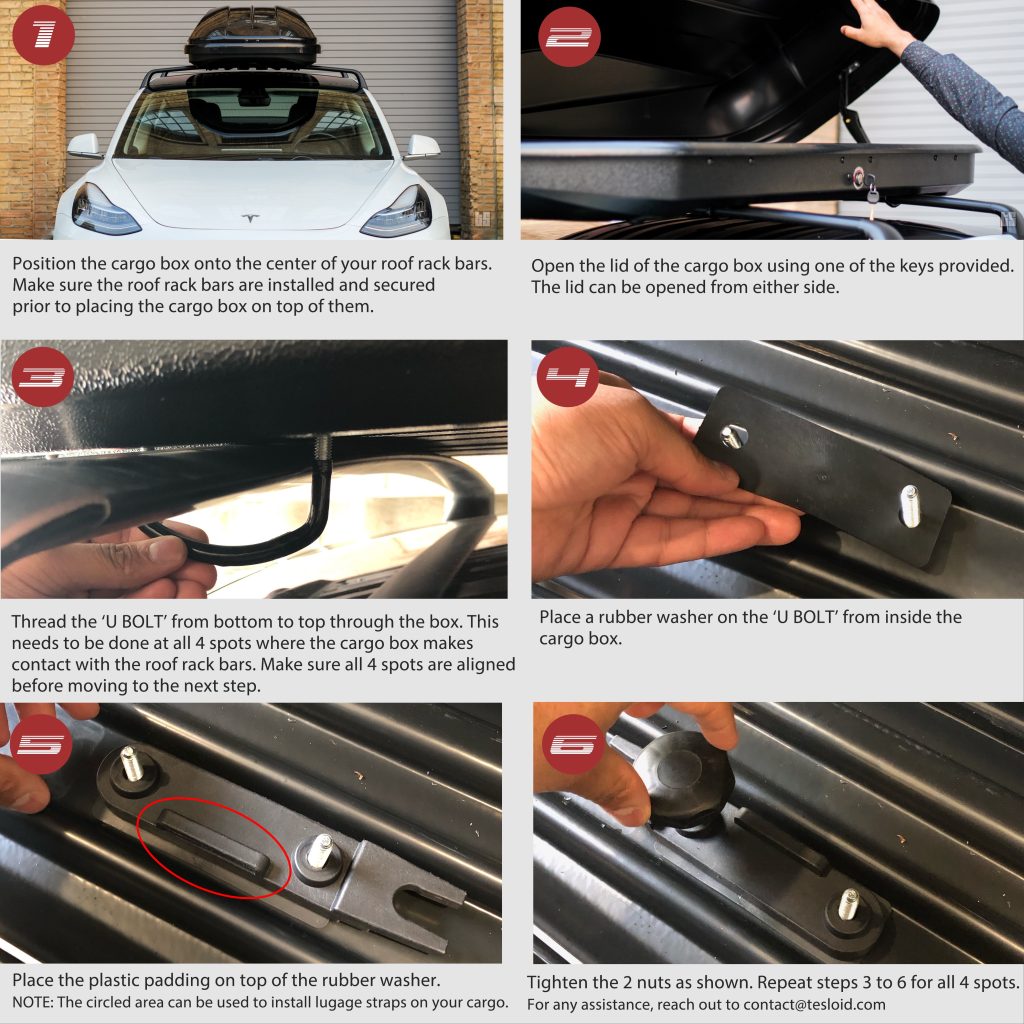
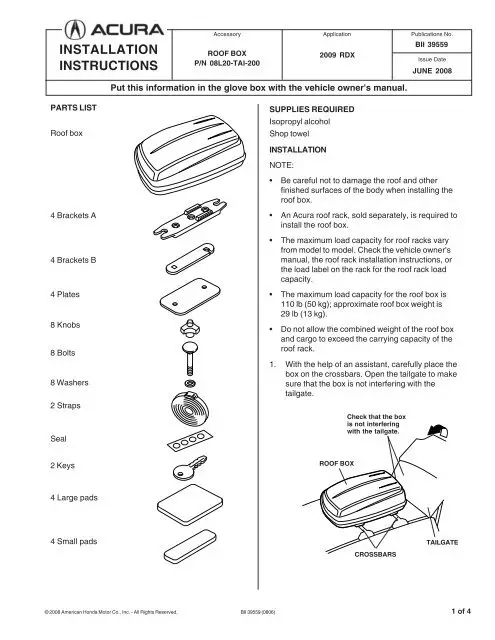
To install a roof box, attach the mounting brackets to your vehicle’s roof bars and secure the box firmly. Follow the manufacturer’s instructions for precise details.
A roof box is an essential accessory for anyone looking to maximize their vehicle’s storage capacity. Perfect for road trips, camping, or family vacations, roof boxes provide extra space for luggage, sports equipment, and other bulky items. They come in various sizes and designs, ensuring that there is a suitable option for every vehicle type.
Installing a roof box is a straightforward process that involves attaching it securely to your car’s roof bars. Proper installation ensures safety and efficiency. Always refer to the manufacturer’s instructions for specific guidance, and make sure the roof box is compatible with your vehicle. Investing in a quality roof box can significantly enhance your travel experience.
Choosing The Right Roof Box
Selecting the perfect roof box can be a game-changer for your travels. You need one that fits your needs and vehicle. Let’s explore the key factors to consider to make an informed decision.
Size And Capacity
The size and capacity of a roof box are crucial. A large roof box is great for big families or long trips. Smaller boxes are ideal for short trips or fewer items. Measure your vehicle’s roof before buying. Ensure the box doesn’t overhang or block your view. Consider the weight capacity. Overloading can be dangerous. Check the box’s dimensions to ensure it fits your items.
| Size | Capacity |
|---|---|
| Small | Up to 300 liters |
| Medium | 300 to 500 liters |
| Large | Over 500 liters |
Material And Durability
Material impacts the roof box’s durability and weight. Common materials include ABS plastic, fiberglass, and aluminum. ABS plastic is lightweight and affordable. Fiberglass offers greater strength but at a higher cost. Aluminum is durable and lightweight, often used in premium models.
- ABS Plastic: Lightweight, affordable, moderate durability.
- Fiberglass: Strong, expensive, heavier.
- Aluminum: Durable, lightweight, premium cost.
Weather resistance is another factor. Ensure the box can withstand rain, snow, and UV rays. Look for boxes with UV protection and waterproof seals. Durability ensures your items stay safe and secure during travel.

Credit: accessories-instructions.landrover.com
Pre-installation Preparation
Before installing your roof box, it’s crucial to prepare adequately. This ensures a smooth installation process and prevents potential damage to your vehicle or roof box. Follow these steps for optimal results.
Check Vehicle Compatibility
Ensure your vehicle is compatible with the roof box. Check the owner’s manual for specifications. Confirm the roof can support the weight of the box and its contents.
- Verify the roof type (naked roof, with rails, etc.).
- Check the roof weight limit.
- Ensure the roof box mounting system matches the vehicle’s roof type.
Gather Necessary Tools
Gather all the tools needed for the installation. This helps in avoiding delays during the process.
| Tool | Purpose |
|---|---|
| Measuring Tape | Ensure accurate placement of the roof box. |
| Screwdriver | Tighten screws and bolts. |
| Allen Wrench | Secure the mounting brackets. |
| Step Ladder | Reach the roof comfortably. |
Having these tools ready will make the installation process smoother and more efficient. Double-check the list to ensure nothing is missing.
By following these preparation steps, you’ll be ready to install your roof box with ease.
Unpacking The Roof Box
Unpacking your roof box can be an exciting first step. It’s important to follow steps to avoid mistakes. Correctly unpacking ensures you have all necessary parts. Let’s dive into the process of unpacking your roof box efficiently.
Inspecting Parts
First, carefully open the box. Avoid using sharp objects to prevent damage. Once open, remove all contents.
Now, inspect each part for visible damage. Look for cracks or dents on the roof box. Also, check for any missing parts. Match each part with the instruction manual. Use the table below to ensure you have everything:
| Part | Quantity | Condition |
|---|---|---|
| Roof Box Shell | 1 | Good |
| Mounting Brackets | 4 | Good |
| Bolts and Nuts | 8 | Good |
| Locking Mechanism | 1 | Good |
Organizing Components
Next, organize the components. Place similar items together. This makes the assembly process easier. For example, keep all bolts and nuts in one place. Arrange mounting brackets side by side.
Use a small container for tiny parts. This prevents losing them. Lay out the larger parts on a clean, flat surface. Ensure everything is easily accessible.
Follow these steps for a smooth unpacking experience. Proper organization saves time and reduces stress. Happy unpacking!
Mounting Roof Bars
Mounting roof bars is a crucial step in installing a roof box. Properly mounted roof bars ensure safety and stability. This guide will walk you through the key steps.
Positioning Roof Bars
Start by reading your car’s manual. It provides specific instructions for roof bars. Next, measure the distance between the bars. Follow the roof box manufacturer’s guidelines.
Place the roof bars on the car’s roof. Ensure they are evenly spaced. Use a measuring tape for accuracy. This prevents imbalance and ensures a secure fit.
| Step | Action |
|---|---|
| 1 | Read car manual |
| 2 | Measure roof bar distance |
| 3 | Place roof bars evenly |
Securing Roof Bars
Once positioned, secure the roof bars tightly. Use the provided clamps or bolts. Follow the manufacturer’s guidelines for tightening.
After securing, check for stability. Push and pull the bars. They should not move. If they do, tighten them more.
- Use clamps or bolts
- Follow tightening guidelines
- Check for stability
Properly secured roof bars are essential. They ensure the roof box stays in place. Always double-check your work for safety.
Attaching The Roof Box
Attaching a roof box to your vehicle may seem challenging. But with the right instructions, it is straightforward. This section will guide you through aligning and fastening the roof box securely.
Aligning The Roof Box
First, position your roof box on the car’s roof rails. Ensure the box is centered. This helps in balancing the load. Use a tape measure to check the distances. Both sides should be equal. This step is crucial for safe driving.
Next, adjust the roof box so it does not hang over the windshield. Leave some space at the front for better aerodynamics. This reduces wind resistance and saves fuel. Now your roof box is aligned and ready for fastening.
Fastening The Roof Box
Start with the clamps that come with your roof box. Open each clamp and place it around the roof rail. Ensure the clamps are tightly fitted. Loose clamps can cause the box to shift during travel.
Secure each clamp by tightening the screws. Use a wrench if needed. Check each clamp twice. This guarantees the box stays in place. Now, fasten the safety straps for extra security.
Here is a simple table for fastening steps:
| Step | Action |
|---|---|
| 1 | Open clamps |
| 2 | Place around roof rail |
| 3 | Tighten screws |
| 4 | Secure safety straps |
Now your roof box is securely attached. Ready for your next adventure!

Credit: accessories-instructions.landrover.com
Securing The Load
Securing the load in your roof box is crucial for a safe journey. Properly securing items prevents them from shifting during travel. This keeps you safe and protects your belongings. Follow these steps to ensure everything stays in place.
Distributing Weight Evenly
Distribute weight evenly in the roof box. This helps maintain balance and control. Place heavy items in the center. Keep lighter items to the sides. This prevents the car from leaning to one side.
Use a simple method to check weight distribution. Divide items into equal piles. Place them symmetrically in the box. This way, each side has the same weight.
Remember, an uneven load can cause handling issues. It can make the car harder to steer. Always double-check the weight distribution before starting your trip.
Using Straps And Nets
Straps and nets are essential for securing the load. They hold items in place during travel. Use sturdy straps to tie down heavy items. Nets help keep smaller items from moving around.
Follow these steps to use straps effectively:
- Place the item in the center of the roof box.
- Loop the strap around the item securely.
- Fasten the strap to the anchor points in the box.
- Pull the strap tight to eliminate slack.
Use nets for loose items. Spread the net over the items. Attach it to the hooks inside the roof box. This keeps everything in place, even on bumpy roads.
Quick Tips:
- Check all straps and nets before starting your trip.
- Ensure there are no loose ends that could flap in the wind.
- Re-tighten straps and nets after loading.
Securing the load ensures a safe and smooth journey. Follow these steps for peace of mind on the road.
Final Checks
Final checks ensure your roof box is secure and ready for travel. Completing these steps prevents any mishaps on the road. Let’s go through the important final checks.
Tightening Bolts
Check all bolts and screws. They must be tight and secure. Use a wrench for this task. Loose bolts can cause accidents.
Here’s a simple checklist for tightening bolts:
- Ensure all bolts are tight
- Use the correct tools
- Check for any worn or rusted bolts
Testing Stability
Testing the stability of your roof box is crucial. Gently shake the box. It should not move or wobble. A stable roof box means safe travel.
Follow these steps for testing stability:
- Secure the roof box
- Gently shake it from side to side
- Observe any movement
- If it moves, tighten the bolts again
Repeat the stability test until the box is firm.
| Final Check | Action |
|---|---|
| Tightening Bolts | Ensure all bolts are tight |
| Testing Stability | Shake the box to check stability |
Safety Tips
Ensuring the safety of your roof box and its contents is crucial. Following specific safety guidelines can prevent accidents and damage. Below are essential safety tips for using a roof box.
Speed Limitations
Adhering to speed limitations is vital. Driving too fast with a roof box can be dangerous. Most manufacturers recommend a maximum speed limit of 75 mph. Exceeding this speed can cause instability and increase the risk of accidents. Always follow the speed limit for the safety of everyone.
Regular Inspections
Regular inspections of your roof box are necessary. Check the box before and after each trip. Ensure that all locks and latches are secure.
Inspect for any signs of wear and tear. Broken parts can lead to accidents. Below is a simple inspection checklist:
- Check for cracks or damage.
- Ensure locks are functional.
- Verify latches are secure.
- Examine attachment points for stability.
Performing these checks regularly keeps your roof box in good condition.

Credit: tesloid.com
Frequently Asked Questions
How Do I Install A Roof Box?
Installing a roof box involves mounting it on your vehicle’s roof rack. Align the box with the rack, secure the clamps or bolts, and ensure it’s tightly fastened. Follow the manufacturer’s instructions for best results.
Can I Use A Roof Box On Any Car?
Most roof boxes are compatible with vehicles that have roof racks. Check your car’s roof rack compatibility and weight limits before purchasing. Always refer to the manufacturer’s guidelines.
How Much Weight Can A Roof Box Hold?
The weight capacity of a roof box varies by model. Typically, they hold between 50 to 75 kg. Always refer to the manufacturer’s specifications and your vehicle’s roof load limit.
How Do I Secure Items In A Roof Box?
Use straps or bungee cords to secure items inside the roof box. Make sure the load is evenly distributed to prevent shifting during transit. Refer to the roof box manual for specific securing methods.
Conclusion
Follow these roof box instructions for a safe, easy installation. Proper use ensures secure storage and travel convenience. Double-check all steps to avoid mishaps. A well-installed roof box offers peace of mind and extra space. Happy travels with your securely mounted roof box!

